Thursday, September 30, 2010

Stamp Assessment: Class Discussion

save this sheet: use this as a guide for our class discussion, then attach it to a grading rubric when passing stamps in

What part of your completed stamp project best shows your creativity and craftsmanship?

After seeing your stamp fired, and testing it in the clay, what aspects of this project could you have improved upon?

What was the most important thing you learned from this project, that you think will help you as you continue to work with clay?

(*check here if you have made an extra credit stamp, and include both stamps when you pass them in.)

Monday, September 20, 2010

Beginning Ceramics
Wheel Challenge!

This project will help you to become familiar with wheel techniques, including centering, forming a pot, and cleaning the wheels.

Objectives: Create a centered, symmetrical wheel form that is smooth and thin enough to be fired.
Use your initial and symbol stamps in the leather hard stage to create a unique surface design.
Carve the block into the bottom of the pot so it can be sorted after being fired.

Have Fun!
Clean up well!!

Friday, September 10, 2010

Creating a Clay Stamp

1. Complete your designs for both the initial stamp and symbol stamp. Check them off with Miss Mahoney. You will put your initials on one side of your stamp, and the picture or symbol on the other.

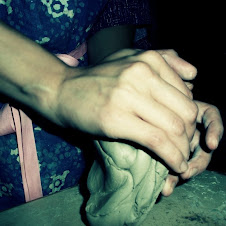
2. Recycle and wedge a piece of clay about the size of an apple.

3. Break off a piece of this clay and begin shaping your stamp handle. Remember that the handles can be circular, square, triangular—whatever you like, but they must not be thickerthan 1”! Leave the ends wider for the images to be put onto.

4. Flatten the ends of your stamp handle so they are smooth and ready for the designs to be drawn on.

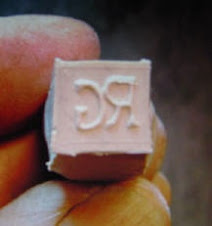
5. Trace your designs onto small pieces of tracing paper with a pencil. Then put the tracing paper pencil side down onto the flattened end. The design should appear backwards at this point. Trace over the design with your pencil or a pin tool and check to make sure the graphite has transferred onto the clay.

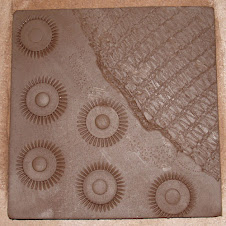
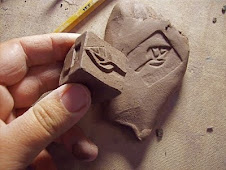
6. Use a pin tool to cut off the clay around your design to make the letters or picture pop up off the block, or use a carving tool to scoop out the clay inside your letters or picture to make them indent into the block.

7. Smooth out the entire stamp: this is best done when most of the carving is complete, and the stamp is leather hard. Scrape out any excess crumbs of clay, use small amounts of water to smooth the handle and surfaces of your stamp.

8. When both sides have been carved, put your name and block on the handle of the stamp (legibly), check it with Miss Mahoney, and put the stamp on the Greenware shelf to be fired!

Wednesday, September 1, 2010

Welcome to Beginning Ceramics!

Miss Mahoney

Clay is an ancient medium that began as a means to create functional objects used in everyday life, and has evolved to become one of the most beautiful forms of artistic expression. In this class, you will have the opportunity to explore your creativity through the form and function of ceramics. I encourage you to take risks and develop your personal style throughout the semester.

In this class, we will study the beginning techniques of pinching, coiling and slab building. We will also practice beginning skills on the wheel. In addition to the class work, you will have weekly assignments reinforcing the techniques we are studying.

For this class you will need:

a shoebox to store clay and projects in

a notebook to record outside assignments and sketch project ideas

five plastic bags to wrap clay in--small trash bags and gallon-sized Ziploc bags work well

Grading

Your projects will be graded by the execution of the technique studied, the glaze or finish, and your written feedback on the grading sheet. Your overall grade will be a combination of your projects, outside assignments, and effort.

Cleanup

Keeping this room clean is a matter of safety. Each artist is responsible for their own workspace as well as a weekly studio job, which will help with the general maintenance of the studio space. Completion of your cleanup jobs will factor into your effort grade.

Expectations

*You will show up on time and remain in class until the bell rings. If you need to leave, tell me. Lining up at the door before the bell shows me that you have extra time to do more cleaning!

*You will work on projects throughout the class, and clean up well every day. Your effort grade is heavily based upon everyday work habits, so make them good. No non-enrolled students are allowed in the room during class time.

*No food or drink in the room. It is unhealthy to eat in this room due to the nature of the materials we use, and this also avoids messes in the workspace.

*No Ipods or cell phones during class. This is a school rule as well as my own rule—these devices are distracting and antisocial, making it difficult for me to teach and for you to learn.

*Respect the kilns! They are almost always running, and they get very hot. Please be careful when bringing work into the kiln room.

*Respect each other. Remember the Golden Rule? Your language and attitude create the atmosphere in our classroom, and make it a comfortable place to be. If you can speak in a respectful way and manage your time well while you are in this class, you will do well this semester.