Tuesday, October 9, 2012

Our next project is a wheel project!  We will start getting people on the wheels this week, but it may take you a few tries to create a project you can save, so this project will not be due until the end of next week or so.

In preparation for this project, I want you to look at images of wheel-made objects.  You will be creating a bowl form, but you can bring in any wheel-made image that inspires you.  Please cut it out of a magazine or print it out--hard copies only! (it doesn't need to be in color).

This image is due Friday, October 12th (or early for extra credit!)

Tuesday, September 18, 2012

For homework this week, you need to collect 3 items that can be used to create textures.

Some ideas include:
tree bark or leaves                 old jewelry
sandpaper                              shells
wire or mesh screen              rope, yarn or string
old small plastic toys (army man, matchbox car, etc.)

...or anything else you can find that might make an interesting print on clay!

We will be using these on our next project, so bring them in on time (or early for extra credit!)

Due Friday September 21st

Monday, September 10, 2012


Creating a Clay Stamp

For this project, you will create both an initials stamp and a symbol stamp.  They can be combined onto the same form, or you may create two separate forms for your stamps.


Think about both the form and the designs you are creating:


*There is a direct and inverse relationship between the stamp you create and the impression it makes on the clay.

*The design you create is a representation of how you wish to be perceived.

Steps for creating your stamps:

1.  After completing your sketches, recycle and wedge
a piece of clay about the size of an apple.

2.  Break off a piece of this clay and begin shaping your stamp handle.  Remember that the handles can be circular, square, triangular—whatever you like, but they must not be thicker than 1”!  Leave the ends wider for the images to be put onto.

3.  Trace your designs onto small pieces of tracing paper with a pencil.  Then put the tracing
paper pencil side down onto the flattened end.  The design should appear backwards at this point--which is especially important for your letters!!  Trace over the design with your pencil or a pin tool
and check to make sure the graphite has transferred onto the clay.

4.  Use a pin tool to cut off the clay around your design to make the letters or picture pop up off the block…or use a carving tool to scoop out the clay inside your letters or picture to make them
indent into the block.

5.  Smooth out the entire stamp: this is best done when most of the carving is complete, and the stamp
is leather hard.  Scrape out any excess crumbs of clay, use small amounts of water to smooth the handle
and surfaces of your stamp.

6.  When both stamps have been carved, put your name and block on the handle of the stamp (legibly), check it with your teacher,  and put the stamp on the Greenware shelf to be fired!

Thursday, August 30, 2012


Miss Patterson
Beginning Ceramics
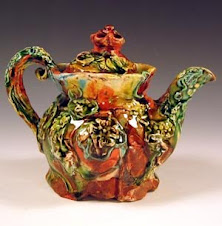
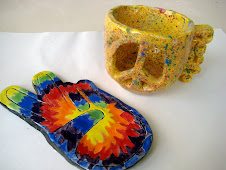
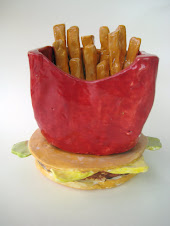
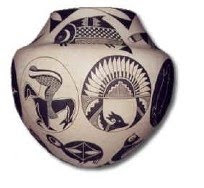
Clay is an ancient medium that began as a means to create functional objects used in everyday life, and has evolved to become one of the most beautiful forms of artistic expression. In this class, you will have the opportunity to explore your creativity through the form and function of ceramics. I encourage you to take risks and develop your personal style throughout the semester.
In this class, we will study the beginning techniques of pinching, coiling and slab building. We will also practice beginning skills on the wheel. In addition to the class work, you will have weekly assignments reinforcing the techniques we are studying.
For this class you will need:
shoebox to store clay and projects in (I have some used ones, or you can get your own)
notebook to record outside assignments and sketch project ideas (lined, blank, leftover from Foundations…)
three plastic bags to wrap clay in--small trash bags and gallon-sized Ziploc bags work well
soap, hand lotion or tissues to contribute to the classroom
These items are due next class!
Grading
Your projects will be graded by the execution of the technique studied, the glaze or finish, and your written feedback on the grading sheet. You are responsible for any assignments written on the board, so check it daily!Your overall grade will be a combination of your projects, outside assignments, and effort.
Cleanup
Keeping this room clean is a matter of safety. Each artist is responsible for their own workspace as well as a weekly studio job, which will help with the general maintenance of the studio space. Completion of your cleanup jobs will factor into your effort grade.
Expectations
*You will show up on time and remain in class until the bell rings. If you need to leave, tell me. Lining up at the door before the bell shows me that you have extra time to do more cleaning!
*You will work on projects throughout the class, and clean up well every day. Your effort grade is heavily based upon everyday work habits, so make them good. No non-enrolled students are allowed in the room during class time.
*No food or drink in the room. It is unhealthy to eat in this room due to the nature of the materials we use, and this also avoids messes in the workspace.
*No Ipods or cell phones during class. This is a school rule as well as my own rule—these devices are distracting and antisocial, making it difficult for me to teach and for you to learn.
*Respect the kilns! They are almost always running, and they get very hot. Please be careful when bringing work into the kiln room
*Respect each other. Remember the Golden Rule? Your language and attitude create the atmosphere in our classroom, and make it a comfortable place to be. If you can speak in a respectful way and manage your time well while you are in this class, you will do well this semester.

Monday, May 7, 2012


Artist Study   *    Mini-Research Paper


For this Artist Study, you will find a ceramic artist whose work you are particularly drawn to…look online, in books or magazines for inspiration.  The artist can be contemporary, meaning they are alive and creating ceramic art today, or they can be from any point in history.

1. Find an artist:  make sure there is enough information about your chosen artist to answer the questions needed!

2. Print out or photocopy at least two images of your chosen artist’s work.  These do not have to be in color, and these photos will be passed in on Thursday, May 10th.

3.  Answer the questions below in paragraph form to create your Artist Study paper.  The paper will be a summary of the artist’s bio as well as why you chose them and what specifically you admire about their work.  This should be about 1 page: make sure you include all the information below!

1. who is your artist -important dates: birth, death (if applicable), when they were creating artwork, where they are from, where they work(ed)

2. what specific techniques do they use? types of clay/glazes, type of kiln/firing process *hint: when you see a word you do not recognize, ex. “raku”, look it up in Google or Wikipedia and describe that in your paper!

3. why did you choose this artist: what drew you to their work? why do you admire this person, what about your knowledge of ceramics makes them particularly interesting?

4. what connections can you make between this person’s work and your own ceramic work? are the two similar in style, concept, form or finish? or are they very different—and how did the similarities/differences influence your decision to choose this artist in particular?

*Please use complete sentences, and type the paper….remember that the content is more important than the length of the paper! *Due Friday, May 18th…or early for extra credit!!

Monday, March 5, 2012

Mad Hatter Cup and Saucer * Personal Assessment

Please answer the following questions in your sketchbooks for Friday, March 9

(or early for extra credit!)

1. If there is anything else you need to do to finish your project, please describe what that is:


2. What did you do during the forming process of your cup and saucer that shows the viewer what your word is?


3. What glazes or underglazes will you use to reinforce your concept after your project is fired?